The editor is the place where you create, edit and design your website content.
There are many ways to design and customize your website. You can add many different elements and even entire layout sections and structure the content using content sections. You can also insert your own logo and define a color scheme and font formats.
Here we give you an overview of the most important functions of the editor:
Elemente hinzufügen
There are many different elements and ready-made layouts that you can use to design your website. Choose from text, images, buttons, dividers, galleries and much more that you can add in the editor.
- Click on the + symbol on the left-hand side of the editor to open the overview of elements
- Select one of the categories
- Drag and drop the desired element to the desired position in a content section.
Elemente bearbeiten, kopieren und löschen
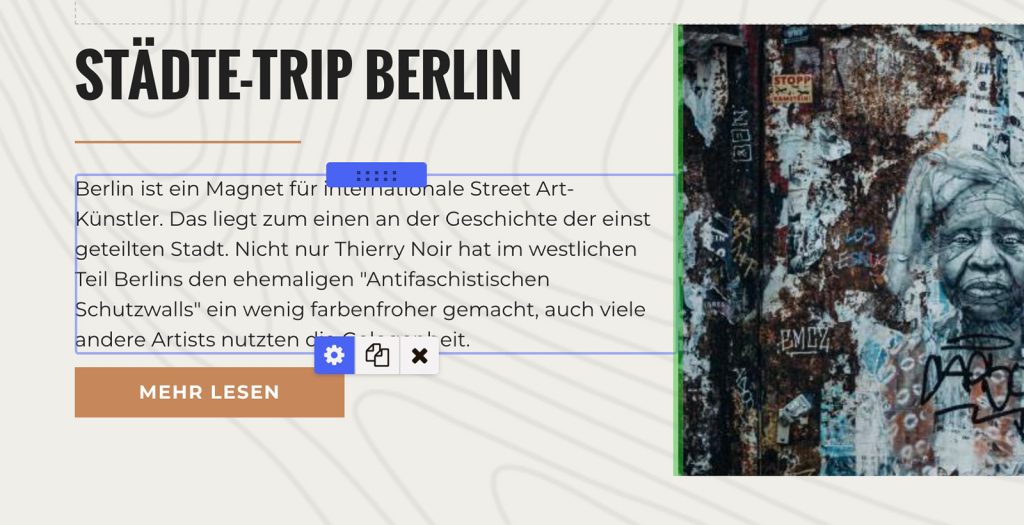
- If you move the mouse over the element, three symbols appear at the bottom of the element:
- Gear icon: opens the settings for an element. Here you can (depending on the element) make important settings, set links, customize the appearance and define spacing.
- Paper icon: copies the element and adds it to the list of copied elements. From there, you can insert the element in other places in your project.
- x symbol: Deletes the element. If you confirm the deletion with ‘Yes’, it is irrevocably deleted.
Move elements
- If you drag the blue bar at the top of the element with the mouse, you can move it (drag-and-drop)

Header und Logo bearbeiten
logo
Click on the logo button at the top right or directly in the logo on the cogwheel symbol to open the settings. Here you can select the type and insert your own logo.
Header image and title
- Header image: Click on the ‘Header/main image’ button at the top right to open the settings for the header image. Here you can change the image motif and make further settings.
- Header title: Each page has a header title and subtitle. Click directly in the fields and you can insert your own text.
You manage the menu items under ‘Menus’ and not in the editor.
Design-Einstellungen verwenden
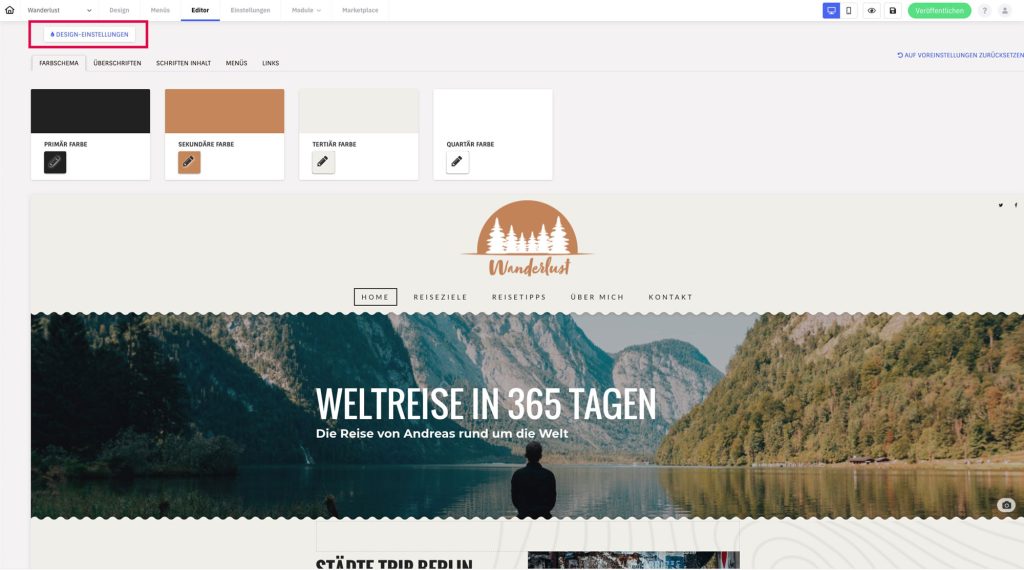
In the “Design settings” at the top left, you can control the colors and fonts of your website globally. The changes will affect all pages and content to which the formats and colors are applied. Read about the functions of the design settings in detail here.

Seite zum Bearbeiten wechseln
If you want to switch to another page to edit it in the editor, simply click on the corresponding menu item. Don’t forget to save any changes before switching to another page.
Speichern, Vorschau und Veröffentlichen
The buttons for Save, Preview and Publish can be found at the top right of the editor.
- Save: If you have not deactivated the option in the settings, the editor automatically saves every 10 minutes. However, click on Save regularly so that your previous work is not lost. Each settings page has a save button. It saves changes automatically on the ‘Menus’ overview page.
- Preview: Click on Preview to see how your website looks live. In the preview, you can also test interactive elements, such as buttons and the captcha, which do not work in the editor.
- Publish: Click on Publish if you want to make your website live. A page will open where you will be guided through the live position.